
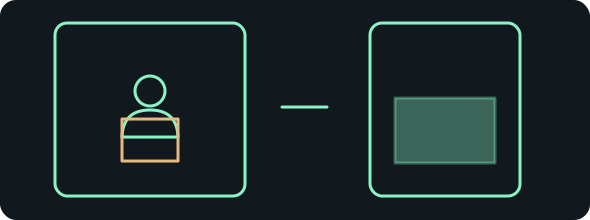
- 01 / processPrepare
Permitted picture and matching inpainting model
- 02 / processSelect
Save a mask over the intended edit
- 03 / processDescribe
Prompt and recorded sampler settings
- 04 / processInspect
Check seams, save image and export recipe
Choose a route
| Route | Cost basis | What you need | What changes |
|---|---|---|---|
| Local ComfyUIFree local | No ComfyUI subscription; own hardware, electricity and model storage. | Compatible local hardware and exact model files; check installation requirements. | More setup and troubleshooting; local-model nodes need no paid API. |
| Comfy CloudPaid hosted | Paid subscription plus runtime credits; a limited free tier is advertised. Check live terms. | Account, available compatible models; Creator, Pro or Team for custom imports. | No local GPU required; uploads leave your device and allowances vary. |
Provider links are ordinary links. Free local software still needs hardware, storage and setup time; inspect current provider terms before paying.
Change one part of an image
Inpainting asks an image model to redraw a selected region. The mask tells the workflow where to work; the prompt describes what should appear there. A mask alone does not describe the replacement, and a prompt alone does not reliably isolate the edit.
Our practice task is to change an orange robot jacket to blue while retaining its cream body and background. Use a picture you own or have permission to edit. The process diagram is an explanation, not a successful before-and-after. Sources were checked on 11 October 2026; this workflow has not been generated or visually benchmarked by us.
Local editing or hosted compute?
Free local: ComfyUI includes the mask editor and the nodes used here. You supply the compatible hardware and download the model. Read local AI requirements before a large download.
Hosted alternative: Comfy Cloud has a free tier and paid subscriptions; check your account's allowance and model availability. The pricing page restricts custom imports to Creator, Pro or Team plans. Confirm the exact checkpoint is supported before paying.
Prepare the right model and workflow
- Install and open ComfyUI using its official installation guidance. Record the installed software/frontend versions in the reader pack's reproduction log. No executed version is pinned in this guide.
- Open the official inpainting tutorial. Download its workflow-bearing image using the provided link and load it with Workflows → Open, or drag the original image onto the canvas. Preserve the downloaded original; a recompressed preview may lose its workflow metadata.
- The tutorial names 512-inpainting-ema.safetensors. Read the repository's model and licence information, then place that exact file in
ComfyUI/models/checkpoints. Windows Portable usesComfyUI_windows_portable/ComfyUI/models/checkpoints; Desktop users should consult the Storage panel for their configured model folders. - Refresh with
Ror restart and select the checkpoint in Load Checkpoint. Follow this tutorial's model/graph pair rather than substituting an SDXL, Flux or an arbitrary SD1.5 checkpoint. The linked file is published in a Stable Diffusion 2.1 repackaged repository; the similar-looking names do not make model families interchangeable.
This guide uses VAE Encode (for Inpainting). Other models may require different conditioning; copying one node from their graphs does not establish compatibility.
Load a picture and draw the mask
- Upload your original image to Load Image. For the first exercise, use a small copy around
512 × 512so inspection and memory use are manageable. Keep the original untouched; crop or resize the copy deliberately rather than stretching it. - Right-click Load Image and choose Open in Mask Editor, or use its mask toolbar button. The current editor documentation distinguishes the Mask Pen from the Paint Pen. Choose Mask Pen: painting the RGB layer changes the input rather than merely selecting the edit area.
- Paint over the jacket, leaving the face, hands and background unselected. Include the collar and sleeve edges that need recolouring. Use the eraser to remove accidental mask marks. Start with one simple region rather than several unrelated fixes.
- Click Save inside the editor. Closing or cancelling without saving will not apply your new mask. The visible overlay can be black, white or inverted for display; do not infer mask meaning from overlay colour alone.
If the opposite area changes, inspect the mask and inversion nodes. In the core encoder implementation, mask value 1 selects the editable region and 0 leaves it unselected. Overlay colour is a separate display setting.
Check the graph and set the replacement
Load Image's IMAGE goes to pixels and its MASK to mask on VAE Encode (for Inpainting). Load Checkpoint's VAE goes to that encoder and to VAE Decode. The encoder's LATENT goes to KSampler's latent_image. The checkpoint MODEL and the two prompt-conditioning outputs also feed KSampler. Its result is decoded, then passed to Save Image.
Use the original task prompt in the positive text encoder:
small cream-coloured robot wearing a blue fabric jacket, blue collar and blue sleeves, natural seams, soft studio lighting
This describes the replacement and surrounding subject. Put text, watermark, duplicate subject in the negative encoder; those preferences are not guaranteed exclusions.
For the first run, retain the upstream workflow's sampler and conditioning settings and record their actual values. Choose seed 424242 and fixed seed control for our comparison exercise. Keep batch size one. grow_mask_by expands the editable boundary; start with the template's value, note it, and change it only if you need a wider transition. Too much expansion can include details you intended to keep.
Run, inspect and export
- Click Run or use
Ctrl + Enterand wait for the queue to complete. If a node fails, retain the exact message and check the model and connections before another attempt. - Inspect the jacket, but also compare the robot's outline, hands, face and background to the original. Look for visible seams or unexpected changes. The mask constrains the editing process; this latent decode workflow does not promise pixel-identical unmasked areas.
- If the jacket barely changes, inspect mask coverage first. Adjusting denoise can affect how much the input is changed, but its effect depends on this model and graph. Keep a record and change one variable per attempt instead of treating a single denoise number as universally correct.
- Save the output image from Save Image's menu, open it locally, and export the graph using Workflows → Export. The local output folder is
ComfyUI/output. Keep the original, edited PNG, mask, prompt andjacket-inpaint-workflow.jsontogether.
For exact preservation outside the jacket, use a separate image editor to composite the accepted edited region over the untouched original, then inspect the join. That is an additional finishing step, not a guarantee supplied by the generation graph. Do not flatten or discard the original until the comparison is complete.
Run the hosted version
In Comfy Cloud, load the official workflow, confirm the checkpoint's availability, upload your permitted image and redraw or import the mask. Check the same wiring, prompt and recorded settings. Run, download the output through its image menu and export the workflow. Uploading the image sends it to a provider, which matters for private material.
Paid subscriptions spend credits on active workflow runtime; editing the graph is not the same as running it. Check the current terms and include failed attempts when recording cost. No account, credit spend or hosted output was tested for this guide.
Troubleshoot and keep the useful evidence
- Nothing changes: confirm you saved the mask, the MASK output is connected and the target area is selected.
- The wrong region changes: check inversion and mask display versus actual mask data.
- A hard seam appears: review mask coverage and
grow_mask_by; test a small adjustment while preserving the previous result. - The whole picture changes: compare model family, graph and mask connections. Keep the original for a final composite if exact outside pixels matter.
- Missing model or nodes: verify the exact official graph and checkpoint; use the missing-node question rather than installing unrelated packs.
The reader pack provides our prompt, mask checklist and a blank reproduction log, not model weights or an untested executable graph. Real generation results, speed and cost remain unknown.
Editable starting prompt
Adapt this to your input and the specific route. It is a starting point, not a guaranteed result.
small cream-coloured robot wearing a blue fabric jacket, blue collar and blue sleeves, natural seams, soft studio lightingTake the steps with you
Reader starter files
The guide, editable prompt, checklist, source register and a blank reproduction log. This pack contains no model weights, executable graph or tested output.
Download the starter packSources and testing status
Primary references checked 2026-10-11. These are documentation-based instructions. We have not run or benchmarked the generation routes described here.